Starting Seeds – 8 Helpful Tips

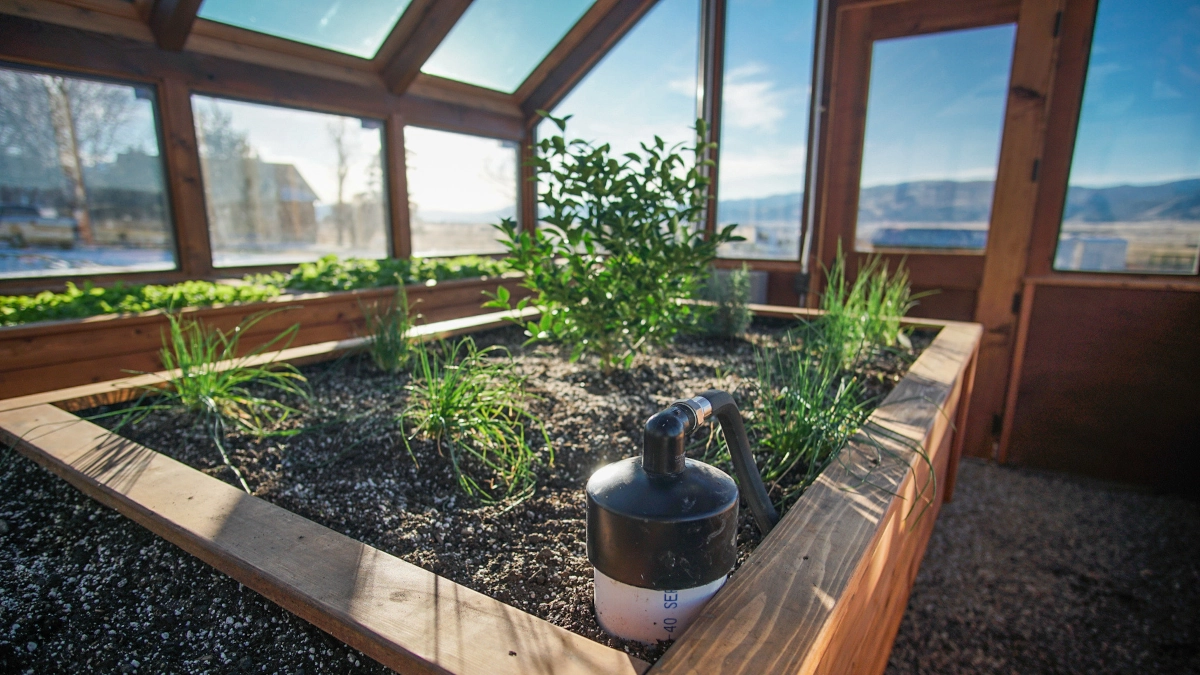
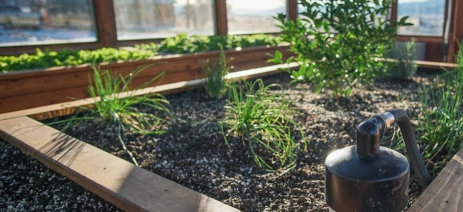
Starting seeds is a cost-effective and rewarding way to grow your own plants, flowers, and vegetables. Whether you have a large garden, greenhouse, or a small windowsill, starting seeds allows you to control the quality of the soil, water, and nutrients that your plants receive. However, if you’re new to starting seeds, you may have a lot of questions about the process. In this article, we’ll answer some of the most common questions about starting seeds.

What equipment do I need to start seeds?

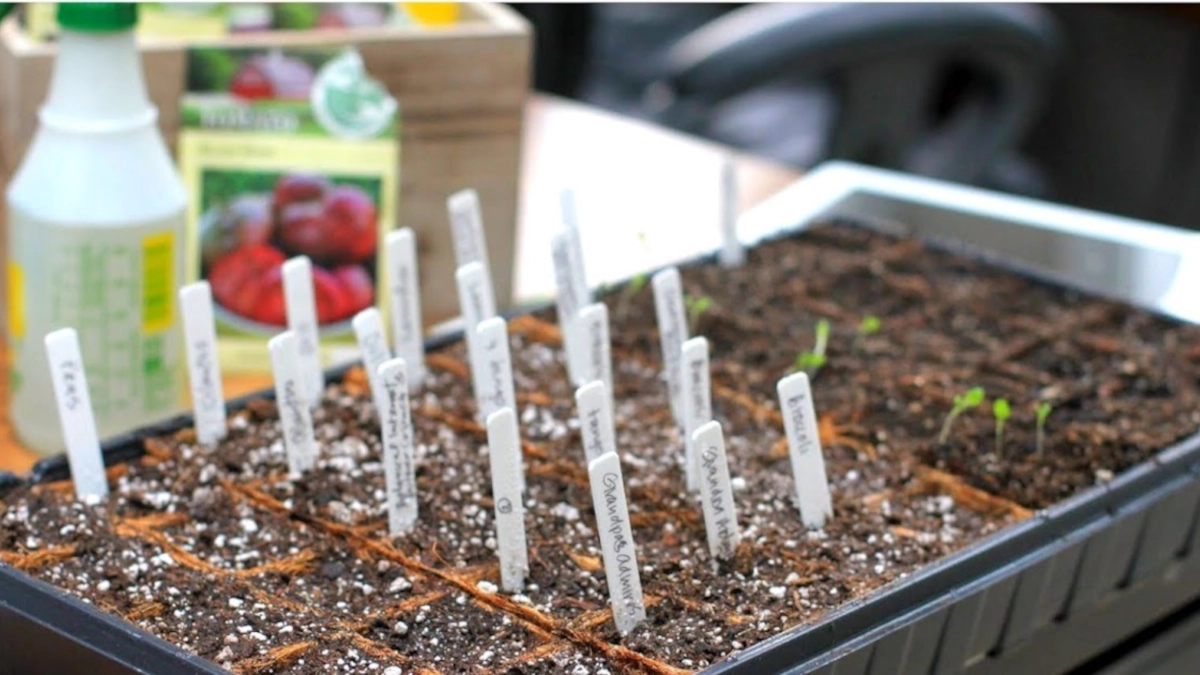
To start seeds, you’ll need a few basic pieces of equipment. These include:

  • Seed starting trays or containers: These can be plastic, biodegradable, or reusable. They should have drainage holes in the bottom to allow excess water to drain out.
  • Seed starting mix: This is a soilless mix that’s designed to be light and fluffy, which makes it easier for seeds to germinate and grow roots.
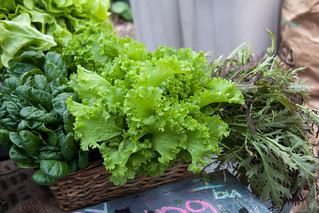
  • Seeds: Choose high-quality seeds from a reputable source. Look for seeds that are fresh and viable, and choose varieties that are well-suited to your growing conditions.
  • Water: You’ll need a source of clean, fresh water to keep your seeds moist.
  • Light: Most seeds need 12-16 hours of bright light per day to germinate and grow. If you’re starting seeds indoors, you’ll need a south-facing window or a grow light.

When should I start my seeds?

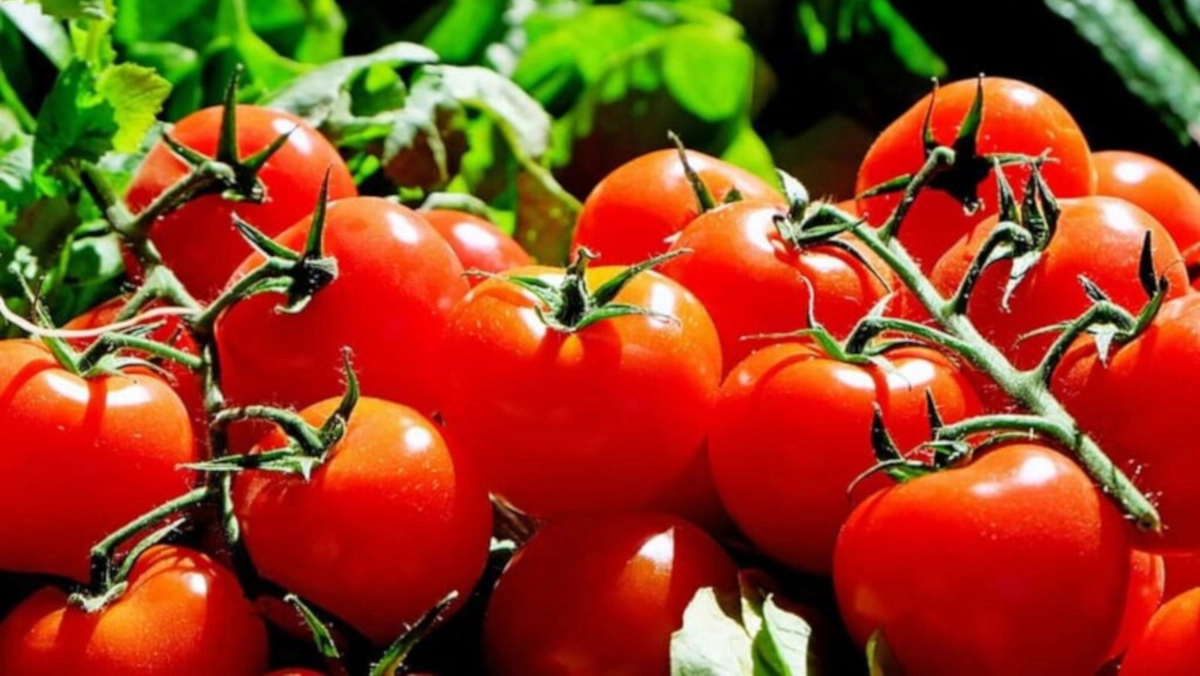
The answer to this question will depend on the plant you want to grow. Some plants, such as tomatoes and peppers, should be started indoors six to eight weeks before the last frost date in your area. Others, like beans and cucumbers, are best started outdoors after the last frost date. Check the seed packet or do some research to determine the best time to start your seeds. Also, read our helpful article about using a planting calendar.

What kind of soil should I use to start my seeds?

When starting seeds, it’s important to use a soilless seed starting mix. These mixes are designed to be light and fluffy, which makes it easier for the seeds to germinate and grow roots. Seed starting mixes also typically contain a blend of peat moss, vermiculite, and perlite, which provide good drainage and aeration for your seeds.

How do I know how deep to plant my seeds?

The general rule of thumb is to plant your seeds twice as deep as their width. For example, if your seed is 1/4 inch wide, plant it 1/2 inch deep. However, some seeds, such as lettuce and herbs, should be planted right on the surface of the soil. Again, check the seed packet or do some research to determine the best planting depth for your seeds.

How much water should I give my seeds?

When starting seeds, it’s important to keep the soil moist but not waterlogged. Too much water can cause the seeds to rot, while too little water can prevent them from germinating. One way to ensure your seeds are getting enough water is to mist them with a spray bottle until the soil is damp. You can also bottom-water your seeds by placing the seed tray in a shallow dish of water and allowing the soil to absorb the water from the bottom up.

How much light do my seeds need?

Most seeds need 12-16 hours of bright light per day to germinate and grow. If you’re starting seeds indoors, place them near a south-facing window or under a grow light. If you’re using a grow light, keep it 2-3 inches above the seedlings and adjust the height as the plants grow taller.

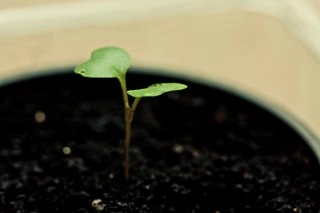
How do I prevent my seedlings from getting leggy?

To prevent your seedlings from getting leggy, it’s important to provide them with enough light. If you’re starting seeds indoors, make sure they’re placed near a south-facing window or under a grow light. Keep the light 2-3 inches above the seedlings and adjust the height as the plants grow taller. It’s also important to not over-fertilize your seedlings, as this can cause them to grow too quickly and become leggy. Additionally, make sure you’re using a soilless seed starting mix that’s light and fluffy, as heavy soil can make it difficult for the seedlings to establish strong roots. Lastly, make sure to space out your seedlings properly in their containers, as overcrowding can also cause them to grow tall and leggy in search of light.

How do I transplant my seedlings?

Transplanting your seedlings is a critical step in the process of growing your own plants. When your seedlings have grown strong enough to be transplanted, they will need more space, nutrients, and sunlight to continue growing. Here are the steps to transplant your seedlings:

  1. Choose a container or spot in your garden where your seedlings will grow. Make sure the container has drainage holes and that the soil is well-draining.
  2. Water your seedlings thoroughly the day before transplanting. This will help to keep the roots moist and make them easier to handle.
  3. Gently loosen the soil around each seedling with a fork or spoon. You want to avoid damaging the roots as much as possible.
  4. Using your fingers, carefully lift each seedling from the soil by grasping the leaves or the stem near the soil line. Avoid pulling on delicate stems or roots.
  5. Place each seedling into the new container or garden spot, making sure it’s planted at the same depth as it was in the seed starting tray.
  6. Fill in the soil around the seedling, gently pressing the soil down around the roots to eliminate air pockets.
  7. Water the newly transplanted seedlings thoroughly and keep the soil evenly moist for the next few days. Avoid overwatering, which can cause the roots to rot.
  8. If you’re transplanting outdoors, make sure to harden off your seedlings by gradually exposing them to outdoor conditions over a period of a week or so. This will help them adjust to the wind, sun, and temperature changes.
  9. With proper care, your seedlings will continue to grow and thrive in their new home. Remember to monitor their progress, provide them with enough water, nutrients, and sunlight, and protect them from pests and diseases.

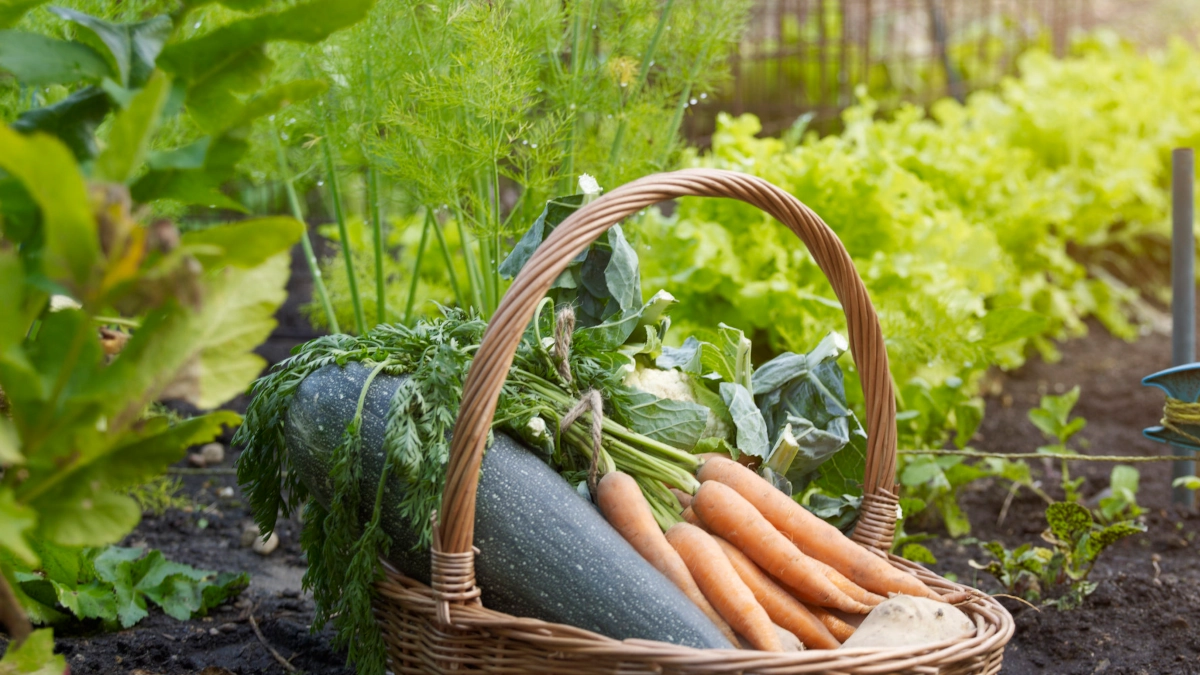
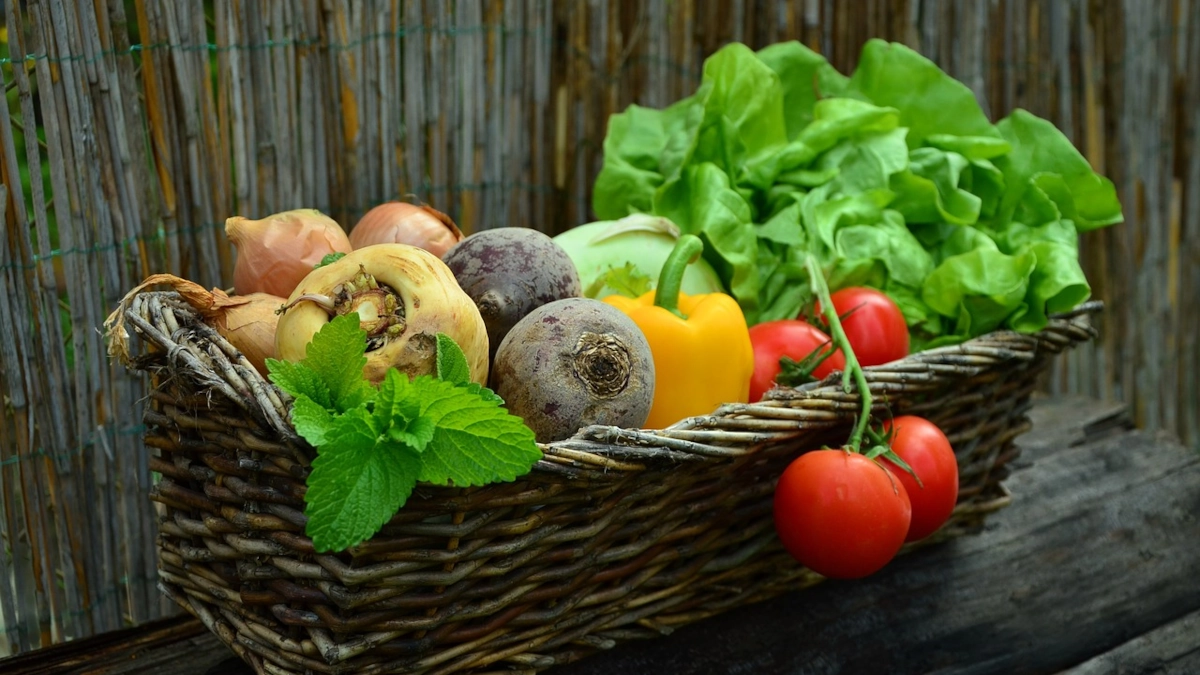
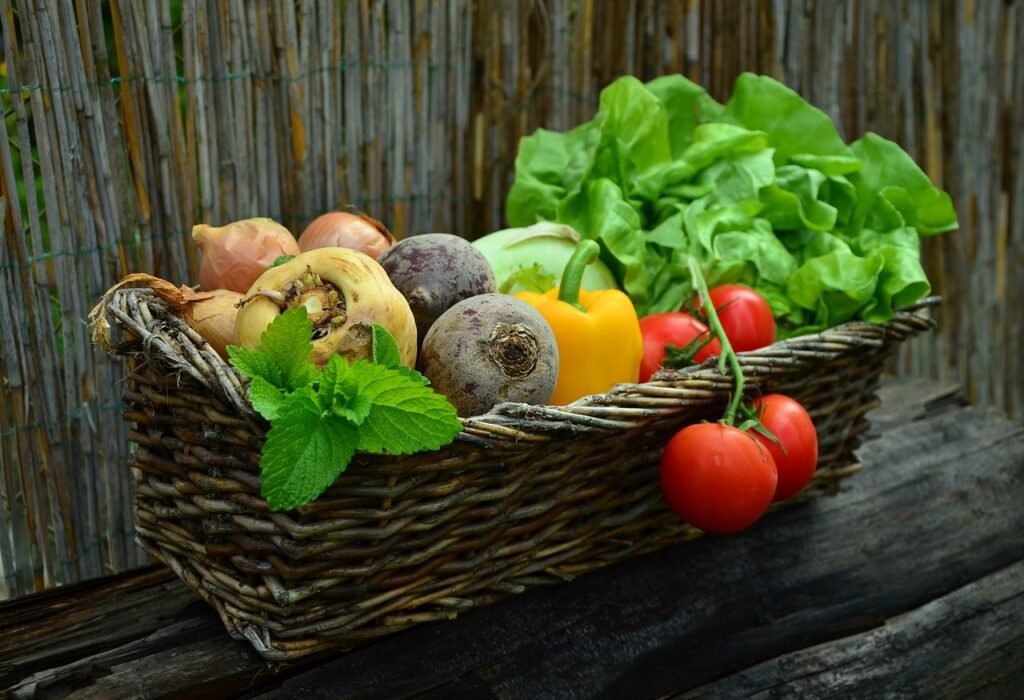
In conclusion, starting seeds is a fun and rewarding way to grow your own plants, flowers, and vegetables. With the right equipment, soil, water, and light, you can grow healthy, strong seedlings that will eventually thrive in your garden, greenhouse, or on your windowsill. By following these common questions and answers about starting seeds, you’ll be well on your way to a successful growing season. Remember to do your research and choose high-quality seeds from a reputable source. With a little patience and care, you’ll soon be enjoying the fruits of your labor. Happy planting!

Further Resources:

https://www.johnnyseeds.com/growers-library/seed-planting-schedule-calculator.html

7 Quick Steps to Get Rid of Pests in Your Greenhouse

How to Get Rid of Pests in Your Greenhouse

Greenhouses are great for growing plants, but unfortunately, they can also attract unwanted pests such as aphids, spider mites, whiteflies, and other insects. These pests can cause damage to plants, reduce yield, and eventually kill them if not managed properly. If you’re dealing with a bug infestation in your greenhouse, here are some steps you can take to get rid of them:

Identify the Pest

  1. Identify the pest: The first step in getting rid of pests in your greenhouse is to identify the pest. Different pests require different methods of control. You can consult with a local garden center, university extension service, or a professional pest control company to help you identify the pests.

Practice Good Hygiene

  1. Practice good hygiene: A clean greenhouse is less likely to attract pests. Sweep the floor regularly to remove debris and fallen leaves. Remove dead plants, leaves, and stems promptly, as they can harbor pests and diseases.

Monitor the Environment

  1. Monitor the environment: Pests thrive in warm and humid environments. Monitor the temperature and humidity levels in your greenhouse and adjust them if necessary. Use a dehumidifier or fans to circulate air and reduce humidity.

Physical Barriers

  1. Use physical barriers: Physical barriers such as screens and netting can keep pests out of your greenhouse. Seal any cracks and gaps that pests can use to enter the greenhouse.

Organic Pesticides

  1. Use organic pesticides: If you need to use pesticides, choose organic options that are safe for your plants and the environment. Some common organic pesticides include insecticidal soap, neem oil, and pyrethrin.

Biological Control

  1. Use biological control: Biological control involves using natural predators to control pests. For example, ladybugs are natural predators of aphids, and they can help to control aphid populations in your greenhouse.

Rotate Crops

  1. Rotate crops: Some pests are specific to certain plant families. To reduce the risk of pest infestations, rotate your crops and avoid planting the same type of plant in the same location year after year.

In conclusion, getting rid of bugs in your greenhouse requires a combination of good hygiene, environmental management, and pest control strategies. By following these tips, you can protect your plants from pests and enjoy a healthy and productive greenhouse.

Get more helpful tips by reading through our blog post page.

For more information:

https://www.gardeningknowhow.com/special/greenhouses/greenhouse-plant-pests.htm

https://www.motherearthnews.com/organic-gardening/pest-control/greenhouse-insect-pests-ze0z1501zdeh/

Growing Vegetables in a Winter Greenhouse in Montana Without a Heating System

Growing Vegetables in a Winter Greenhouse in Montana Without a Heating System

Montana, a state in the western region of the United States, is known for its cold winters, with average temperatures ranging from the mid-20s to mid-30s Fahrenheit (-4°C to 1°C) in January. However, with the use of a greenhouse, it is possible to grow vegetables during the winter months, even without a heating system. In this article, we will discuss the factors to consider when growing vegetables in a Montana winter greenhouse without a heating system.

Selecting the Right Vegetables

When growing vegetables in a winter greenhouse in Montana, it is important to choose the right vegetables that are tolerant to colder temperatures. Some vegetables that are good options for winter greenhouse gardening in Montana include:

  1. Leafy Greens – Kale, spinach, chard, and lettuce are great options for a winter greenhouse in Montana gardening. They grow quickly and are cold-tolerant.
  2. Root Vegetables – Carrots, turnips, and beets are excellent winter vegetable options. They can handle cold temperatures and take longer to mature, which makes them ideal for winter gardening.
  3. Brassicas – Broccoli, cabbage, cauliflower, and Brussels sprouts are cold-hardy vegetables that can tolerate colder temperatures.

Preparing Your Greenhouse

To grow vegetables in a winter greenhouse in Montana without a heating system, it is essential to have a well-insulated greenhouse. The insulation will help retain heat inside the greenhouse during the day and night. You can also use thermal mass, such as water barrels or rocks, to absorb heat during the day and release it at night.

Before planting your vegetables, you should clean and sanitize the greenhouse. This will help to prevent any diseases or pests from affecting your plants. You can use a mixture of water and vinegar or hydrogen peroxide to sanitize the greenhouse.

If your greenhouse has windows, it is a good idea to cover them with clear plastic to help retain heat inside the greenhouse. You can also use row covers or cold frames to provide additional protection for your plants.

Planting Your Vegetables

When planting your vegetables in a winter greenhouse in Montana without a heating system, it is essential to consider the timing of your planting. You will want to plant your vegetables when the outside temperatures are starting to cool down, but before it gets too cold. This will give your vegetables enough time to grow before the temperatures drop too much.

You should also make sure that you have good-quality soil for your plants. You can use a combination of compost, peat moss, and perlite to create a well-draining soil that is rich in nutrients.

When planting your vegetables, make sure that they are properly spaced apart. Crowded plants can lead to poor air circulation and an increased risk of disease.

Watering Your Vegetables

In a winter greenhouse in Montana, it is important to monitor the moisture levels of your soil regularly. During the winter months, the air inside the greenhouse can be very dry, which can cause the soil to dry out quickly.

You should water your vegetables regularly, but be careful not to overwater them. Overwatering can lead to root rot and other plant diseases. You can use a moisture meter to determine when your soil needs to be watered.

Lighting Your Greenhouse

In Montana, winter days are short and often cloudy. This can limit the amount of sunlight that your vegetables receive. You can use artificial lighting to supplement the natural light that your vegetables receive.

LED grow lights are an excellent option for winter greenhouse gardening. They are energy-efficient and produce a full spectrum of light that is beneficial for plant growth.

Maintaining Your Greenhouse

Maintaining your greenhouse in the winter is crucial to the success of your vegetable garden. During the winter months, it is important to monitor the temperature, humidity, and moisture levels in your greenhouse regularly. You should check your greenhouse for any drafts, leaks, or damage that may let in cold air. Additionally, it is essential to clean and sanitize your greenhouse regularly to prevent any pests or diseases from affecting your plants. You can also use row covers or cold frames to provide additional protection for your plants. Proper maintenance and upkeep of your greenhouse will ensure that your vegetables thrive throughout the winter season.

Conclusion

In conclusion, growing vegetables in a winter greenhouse in Montana without a heating system is possible with the right planning, preparation, and selection of cold-tolerant plants. By choosing the right vegetables, preparing your greenhouse, planting and spacing your vegetables properly, monitoring moisture levels, and supplementing with artificial lighting, you can enjoy fresh vegetables throughout the winter months. With a little bit of effort and dedication, you can enjoy the benefits of fresh produce all year round, even in the coldest of winters.

We at Heritage Growing Spaces would love the opportunity to build a winter greenhouse in Montana that will help you grow fresh, healthy vegetables all year round. Contact us for more details.

For more helpful information:

https://www.gardeningknowhow.com/special/greenhouses/greenhouse-vegetable-plants.htm

https://garden.lovetoknow.com/vegetable-garden/greenhouse-vegetables-grow-winter

“Four Season Harvest” by Eliot Coleman: http://amzn.to/2a7jV9R

“The Winter Harvest Handbook” by Eliot Coleman: http://amzn.to/2ahjPiR

“The Year-Round Vegetable Gardener” by Niki Jabour: http://amzn.to/2a7ksbJ

Why Using a Greenhouse in Montana is an Essential Tool

Greenhouse in Montana

Montana is known for its harsh winter weather and unpredictable climate. However, gardening enthusiasts in Montana can still enjoy a year-round growing season with the help of a greenhouse. A greenhouse is a structure that is designed to provide an ideal growing environment for plants. It can be used to grow a variety of plants, including vegetables, fruits, flowers, and herbs. Here are some reasons why using a greenhouse in Montana is important:

Extended Growing Season

Montana’s short growing season is a challenge for gardeners. The frost-free growing season in Montana ranges from 90 to 120 days, which means that gardeners have a limited time to grow their crops. However, with a greenhouse, gardeners can extend the growing season and grow plants all year round. A greenhouse provides a controlled environment where temperature, humidity, and light can be regulated, allowing gardeners to grow plants even in the dead of winter.

Protection from Harsh Weather

Montana is known for its extreme weather conditions, including heavy snow, strong winds, hail, and freezing temperatures. These weather conditions can damage plants and destroy crops, making it difficult for gardeners to grow plants outdoors. A greenhouse provides protection from harsh weather conditions, allowing gardeners to grow plants without worrying about the weather. Gardeners can grow plants in a controlled environment that is shielded from the wind, snow, and hail.

Increased Yield and Quality

A greenhouse provides a controlled environment where plants can grow in ideal conditions. Gardeners can regulate the temperature, humidity, and light, providing plants with optimal growing conditions. This leads to increased yield and quality of crops. In a greenhouse, plants can grow faster and healthier, producing more fruits and vegetables than they would in an outdoor garden. The controlled environment also helps to prevent pests and diseases, leading to healthier plants and higher-quality produce.

Protection from Pests

In addition to providing protection from harsh weather conditions, a greenhouse can also protect plants from pests like deer and elk. Montana is home to a variety of wildlife, including deer and elk, which can damage plants and crops. These animals can cause significant damage to gardens and crops, leading to losses for gardeners. However, a greenhouse provides a barrier that keeps these animals out, protecting plants from damage. Gardeners can grow plants in a safe and secure environment, free from the threat of wildlife damage. This added protection from pests is another important reason why using a greenhouse in Montana is important for any gardener.

Versatility

A greenhouse can be used for a variety of gardening purposes. It can be used to grow vegetables, fruits, herbs, flowers, and even exotic plants that cannot grow outdoors in Montana’s climate. A greenhouse can also be used for seed starting, propagation, and overwintering plants. Gardeners can experiment with different gardening techniques and grow a variety of plants in a greenhouse, making it a versatile and useful tool for any gardener.

Sustainability

A greenhouse is a sustainable way to grow plants. With a greenhouse, gardeners can reduce their carbon footprint by growing their own food and plants. They can also reduce the use of pesticides and herbicides, which are harmful to the environment. Growing plants in a greenhouse also reduces the need for the transportation of produce, reducing the carbon emissions associated with transportation. In addition, growing plants in a greenhouse can help to conserve water, as water can be reused and recycled in a closed environment.

Health

Health is probably the greatest of all benefits of a greenhouse. Being outside in nature is a way to escape the stresses in life. Did you know that greenhouses with diffused lighting can help in alleviating Seasonal Affective Disorder, or SAD a common problem for people who live in Montana? A greenhouse is exactly what you need to lift your spirits when you’re feeling down. It requires you to make an initial investment, but the money you spend is well worth it in the long term. It is an investment that promotes healthy living, a sustainable environment, and fresh, healthy, nutrient-dense food.

Conclusion

Using a greenhouse in Montana is important for any gardener who wants to grow plants all year round. A greenhouse provides a controlled environment where plants can grow in ideal conditions, leading to increased yield and quality of crops. It also provides protection from harsh weather conditions, versatility, and sustainability. With a greenhouse, gardeners can experiment with different gardening techniques and grow a variety of plants, making it a versatile and useful tool for any gardener.

Heritage Growing Spaces was born out of a desire to provide our neighbors with a service that will help them achieve their goal of becoming self-reliant. We have a passion to help promote healthy living, a sustainable environment, and fresh, healthy, nutrient-dense food.

At Heritage Growing Spaces we take pleasure in working with our clients to fulfill the dream of having their own unique greenhouse. We have the expertise to help you realize that dream no matter how simple. Contact us for a free initial consultation.

hgspaces.com

Best Plants to Grow in a Greenhouse

Vegetable Basket

Plants to Grow in a Greenhouse

A greenhouse is an ideal environment for growing a wide range of plants and vegetables, regardless of the climate or season. By controlling temperature, humidity, and lighting, greenhouse gardening allows you to grow fresh produce year-round and even extend the growing season for outdoor plants. However, choosing the right plants for your greenhouse can be a challenge, as different species have different growing requirements. Here are some of the best plants and vegetables to grow in a greenhouse:

Tomatoes

  1. Tomatoes: Tomatoes are one of the most popular plants to grow in a greenhouse, thanks to their high yield and delicious taste. They prefer warm temperatures, so a greenhouse is an ideal environment for them. Tomatoes need plenty of sunlight, so make sure they receive at least 6-8 hours of direct sunlight each day.

Cucumbers

  1. Cucumbers: Another popular plant to grow in a greenhouse, cucumbers are easy to grow and highly productive. They require warm temperatures and plenty of moisture, so keep the greenhouse humidity levels high. Cucumbers also need support as they grow, so provide trellises or stakes for them to climb.

Peppers

  1. Peppers: Whether you prefer sweet or spicy, peppers are an excellent choice for greenhouse gardening. They require warm temperatures and plenty of light, so make sure they receive adequate exposure to the sun. Peppers can be grown in containers, making them an excellent option for small greenhouses.

Aubergine

  1. Eggplants: Eggplants are heat-loving plants that thrive in the warm, humid environment of a greenhouse making them a great plant to grow in a greenhouse. They require well-draining soil and plenty of light, so make sure they receive direct sunlight for at least 6-8 hours each day. Eggplants can also be grown in containers, making them ideal for smaller greenhouses.

Leafy Greens

  1. Leafy greens: Leafy greens like lettuce, spinach, and kale are easy to grow in a greenhouse and provide a nutritious addition to any meal. They prefer cooler temperatures, so make sure the greenhouse temperature doesn’t get too high. Leafy greens also require plenty of moisture, so keep the soil consistently moist.

Herbs

  1. Herbs: Herbs like basil, thyme, and oregano are easy to grow in a greenhouse and provide fresh, aromatic flavors to your meals. They prefer warm temperatures and plenty of sunlight, so make sure they receive at least 6-8 hours of direct sunlight each day. Herbs can be grown in containers or in the ground, depending on your preference.

Strawberries

  1. Strawberries: If you have a sweet tooth, consider growing strawberries in your greenhouse. They prefer cooler temperatures and high humidity, making them an excellent choice for greenhouse gardening. Strawberries can be grown in hanging baskets or containers, making them ideal for small greenhouses.

Microgreens

  1. Microgreens: Microgreens are the young, tender shoots of various plants that are harvested when they are just a few inches tall. They are packed with nutrients and add a burst of flavor to salads, sandwiches, and other dishes. Microgreens can be grown in trays or containers in a greenhouse and require minimal space and care.

Melons

  1. Melons: Melons like watermelon and cantaloupe are a delicious and refreshing treat in the summer months. They require warm temperatures and plenty of sunlight, so make sure they receive direct sunlight for at least 6-8 hours each day. Melons also require plenty of moisture, so keep the soil consistently moist.

Citrus Trees

  1. Citrus trees: If you live in a cooler climate, growing citrus trees in a greenhouse is an excellent way to enjoy fresh, juicy fruit year-round. Citrus trees require warm temperatures and plenty of sunlight, so make sure they receive direct sunlight for at least 6-8 hours each day. They also require well-draining soil and regular fertilization to thrive.

In conclusion, a greenhouse is a fantastic way to grow just about any type of plant or vegetable you desire.

If you would like to find out more about the benefits of growing in a greenhouse contact us.

More Resources:

https://www.gardeningetc.com/advice/what-to-plant-in-a-greenhouse

How about Flowers?

The Right Type of Greenhouse

Greenhouses are excellent tools for successful gardening, especially in areas with extreme weather conditions like Montana. They provide a controlled environment where plants can thrive and grow throughout the year, regardless of the outdoor climate. However, choosing the right type of greenhouse is crucial to ensure that your gardening efforts are successful. In this article, we will explore the factors you should consider when selecting the type of greenhouse that will suit your gardening needs.

1. Purpose

The first factor to consider when choosing a greenhouse is the purpose you intend to use it for. Greenhouses can be used for various purposes, such as growing flowers, vegetables, herbs, or as a place for propagating plants. Understanding the primary purpose of your greenhouse will help you choose the type that will suit your gardening needs.

2. Climate

The second factor to consider is the climate of your location. Greenhouses are designed to provide a controlled environment, but the type of greenhouse you choose should reflect the climate of your location. For instance, if you live in an area with a cold climate, a greenhouse with a solid roof and insulated walls will be ideal. This type of greenhouse can retain heat and keep the interior warm. On the other hand, if you live in a hot climate, a greenhouse with a shade cloth or vented roof will be best. This type of greenhouse will allow for better airflow, preventing overheating and allowing plants to thrive.

3. Size

The size of your greenhouse is another crucial factor to consider. The size of your greenhouse will depend on the amount of space you have available, the number of plants you intend to grow, and the purpose of the greenhouse. If you have limited space, you can consider building a small greenhouse or a lean-to greenhouse attached to an existing building. A larger greenhouse will be suitable if you have a lot of plants or if you intend to use it as a commercial venture.

4. Materials

The materials used to construct the greenhouse are another critical factor to consider. The most common materials used are glass, polycarbonate, and polyethylene. Glass is the most expensive option but offers the most clarity and is the most durable. Polycarbonate is a more affordable option and offers good insulation and durability. Polyethylene is the most affordable option but offers the least durability and clarity. Consider the pros and cons of each material and choose the one that best suits your needs and budget.

5. Ventilation

Ventilation is an essential aspect of a greenhouse, and the type of greenhouse you choose should reflect this. A greenhouse with proper ventilation will prevent the buildup of heat and humidity, preventing the growth of mold and mildew. A greenhouse with roof vents, side vents, and fans will offer the best ventilation.

In conclusion, choosing the right type of greenhouse is crucial to ensure successful gardening. Consider the purpose of the greenhouse, the climate of your location, the size, materials used, and ventilation when selecting the type of greenhouse that will best suit your gardening needs. With the right greenhouse, you can enjoy gardening throughout the year and have healthy, thriving plants.

If you would like to talk with a greenhouse building contractor for more information contact us at Heritage Growing Spaces. We would love to help you build your dream greenhouse!

Other Helpful Resources:

https://www.thespruce.com/how-to-choose-a-greenhouse-5224668

The Best Soil Mixture for Raised Beds

Best Soil Mixture for Raised Beds

When it comes to gardening, the soil mixture is an essential element that determines the success or failure of your plants. One popular method of gardening is using raised beds, which provide several benefits such as improved drainage, better control over soil quality, and reduced weed growth. But what is the best soil mixture for raised beds? In this article, we will explore the different types of soil and how to create the best soil mixture for a raised bed.

Types of Soil

There are three main types of soil: sand, silt, and clay. Sand has large particles, which allows for good drainage but does not retain water well. Clay has tiny particles that hold water but can be dense and poorly draining. Silt falls between the two in terms of particle size and drainage. A good soil mixture for a raised bed will combine all three types of soil in the right proportions to provide a balanced environment for your plants.

Determine Soil Texture

The first step in creating the best soil mixture for raised beds is to determine the soil texture of your garden. You can do this by performing a simple test using a jar, water, and soil. Fill a jar with water, add soil, and shake it vigorously for a minute. Let the jar sit for several hours until the particles settle into layers. The bottom layer will be sand, the middle layer silt, and the top layer clay. By measuring the thickness of each layer, you can determine the soil texture of your garden.

Make the Right Adjustments

Once you know your soil texture, you can adjust your soil mixture accordingly. A good soil mixture for raised beds should contain 50% topsoil, 25% compost, and 25% sand or perlite. Topsoil is the upper layer of soil that contains the most organic matter and nutrients. Compost is decomposed organic matter that enriches the soil and improves drainage. Sand or perlite improves drainage and prevents compaction.

If your garden has sandy soil, you can increase the amount of compost and topsoil in your mixture to improve water retention. If you have clay soil, you can add more sand or perlite to improve drainage. You can also add organic matter such as peat moss, leaf mold, or shredded bark to improve the texture and fertility of your soil.

When choosing topsoil for your raised bed, it is important to avoid soil that has been treated with pesticides or herbicides. You can buy organic topsoil from a garden center or create your own by mixing equal parts of compost, sand, and soil. Compost can be made at home by collecting food scraps, leaves, and other organic matter in a compost bin. Over time, the materials will decompose and turn into rich, black soil that can be used to improve your soil mixture.

Maintain the pH of the Soil Mix

In addition to the right soil mixture, it is also important to maintain the pH level of your soil. Most plants prefer slightly acidic soil with a pH range of 6.0 to 7.0. You can test the pH level of your soil using a soil testing kit available at garden centers. If your soil is too acidic, you can add lime to raise the pH level. If your soil is too alkaline, you can add sulfur to lower the pH level.

In conclusion, the best soil mixture for raised beds is one that combines topsoil, compost, and sand or perlite in the right proportions for your soil type. By adjusting the amount of each component, you can improve the texture, drainage, and fertility of your soil. It is also important to maintain the pH level of your soil to ensure that your plants receive the nutrients they need to thrive. With the right soil mixture and pH level, you can create a healthy environment for your plants and enjoy a bountiful harvest.

Get more gardening tips here.

More Resources:

Gardener Ideas

Bob Villa

What is a Sub-Irrigated Planter System (SIPS)?

Sub-Irrigated Planter

A sub-irrigated planter system (SIPS) is a unique method of container gardening that is gaining popularity among gardeners worldwide. It is a self-watering system that uses a wicking process to provide water to plants from below. The SIPS consists of a reservoir at the bottom of the planter, a layer of soil above the reservoir, and a wick that draws water from the reservoir into the soil, providing a consistent supply of moisture to the plant’s roots.

Sub-Irrigated Planter System Design

The design of the SIPS is simple but effective. The reservoir, which is typically made of sturdy plastic material, is filled with water. A layer of soil is added above the reservoir, and a wick made of a porous material such as felt, cloth, or a cotton rope is inserted into the soil, with one end in the reservoir and the other end in contact with the soil. When the plant is placed into the planter, its roots grow into the soil and take up water from the wick through capillary action.

Consistent Source of Moisture

One of the benefits of using a SIPS is that it provides a consistent source of moisture to the plant’s roots, which is crucial for healthy growth. Traditional planters rely on the gardener to water the plants manually, which can result in inconsistent watering and over or under-watering. With a SIPS, the plant’s roots take up water as needed, ensuring that they receive a steady supply of moisture without the risk of over or under-watering.

Another advantage of SIPS is that they are more efficient in their use of water than traditional planters. The reservoir at the bottom of the planter holds a significant amount of water, which means that the plant’s roots have access to water for a longer period before the need for a refill. Additionally, the wicking process is highly efficient, ensuring that almost all of the water in the reservoir is used by the plant.

SIPS is also beneficial for plants in hot and dry climates or during periods of drought. The self-watering system ensures that plants receive water consistently, reducing the risk of dehydration and stress. In some cases, SIPS can also reduce the need for daily watering, which can be particularly helpful during times when water is scarce or restricted.

Grow a Wide Variety of Plants

SIPS can be used to grow a wide variety of plants, including vegetables, herbs, and flowers. Because the system provides a consistent source of moisture, plants grown in SIPS tend to be healthier and more productive than those grown in traditional planters. This is particularly true for vegetables and herbs, which require a lot of water to thrive.

Low Maintenance

One of the most significant advantages of SIPS is that they are straightforward to set up and maintain. The basic design of the system is easy to understand and can be adapted to suit a range of planter sizes and shapes. Additionally, SIPS requires less maintenance than traditional planters, as there is no need to water the plants manually or worry about water draining out of the planter.

Environmentally Friendly

SIPS is also environmentally friendly. The efficient use of water reduces wastage, making it an ideal choice for gardeners who are conscious of their water usage. Additionally, the use of SIPS can reduce the need for chemical fertilizers and pesticides, as the consistent supply of moisture and nutrients promotes healthy plant growth and reduces the risk of pests and diseases.

Conclusion

In conclusion, sub-irrigated planter systems (SIPS) are a simple and effective way of growing plants in containers. The self-watering system provides a consistent source of moisture to the plant’s roots, promoting healthy growth and reducing the risk of over or under-watering. SIPS is more efficient in its use of water, making them an ideal choice for gardeners in hot and dry climates or during periods of drought. Additionally, SIPS is easy to set up and maintain.

At Heritage Growing Spaces, a greenhouse building contractor, we highly recommend the use of self-watering sub-irrigated planters in your new dream greenhouse. For all the positive reasons above. The SIPS in combination with three-foot-tall raised beds makes for a convenient and comfortable way to garden year-round. Whether you are an experienced gardener or a novice, the low maintenance of the SIPS is a great option to choose. For more information contact us.

MORE RESOURCES:

https://albopepper.com/SIP-raised-bed.php

https://www.greenhousegrower.com/production/plant-culture/special-series/subirrigation-watering-from-the-ground-up/

https://ag.umass.edu/greenhouse-floriculture/fact-sheets/subirrigation-systems

Why Homegrown Organic Produce is the Best

Homegrown organic produce

In recent years, there has been a growing trend towards organic produce, and for good reason. Organic produce is grown without the use of harmful chemicals, pesticides, and fertilizers, which can be harmful to both our health and the environment. However, not all organic produce is created equal. Eating homegrown organic produce is the best option, and here’s why.

Your Freshest Option

First and foremost, homegrown organic produce is the freshest option available. When you grow your own fruits and vegetables, you have complete control over when they are harvested. This means that you can pick them at the peak of ripeness, ensuring that they are packed full of nutrients and bursting with flavor. In contrast, store-bought produce is often picked before it is fully ripe so that it can survive the journey to the grocery store. This means that it is often lacking in flavor and nutrients, and may have traveled long distances, resulting in a larger carbon footprint.

You know what is in it

Furthermore, when you grow your own produce, you know exactly what has gone into it. You have control over the type of soil, water, and fertilizers that are used, ensuring that your produce is free from harmful chemicals and pesticides. This is particularly important for those who are concerned about the long-term effects of exposure to these chemicals, as many pesticides have been linked to a variety of health problems, including cancer, reproductive disorders, and neurological conditions.

Support local agriculture

In addition, eating homegrown organic produce is a great way to support local agriculture and reduce your carbon footprint. When you buy produce from a grocery store, it often has to travel long distances to get to you. This transportation adds to the carbon emissions that contribute to climate change. However, when you grow your own produce, you eliminate the need for transportation, reducing your carbon footprint and supporting local agriculture.

Save Money

Another benefit of homegrown organic produce is that it can save you money in the long run. While there may be some initial costs associated with setting up a garden, such as buying seeds, tools, and soil, these costs are often offset by the savings that come from not having to buy produce from the grocery store. In addition, homegrown organic produce is often more abundant than store-bought produce, so you can preserve the excess through canning, freezing, or dehydrating, ensuring that you have a supply of fresh produce year-round.

Have a healthier lifestyle

Eating homegrown organic produce also encourages a healthier lifestyle. When you have a garden, you are more likely to spend time outdoors, getting fresh air, and exercising. This can have a positive impact on your mental health and well-being, as well as your physical health. Additionally, when you grow your own produce, you are more likely to eat a wider variety of fruits and vegetables, as you will be growing what you like to eat and experimenting with new varieties.

It’s fun and rewarding

Lastly, growing your own produce is a fun and rewarding experience. There is something incredibly satisfying about watching a tiny seedling grow into a full-grown plant and then harvesting the fruits of your labor. It is a great way to connect with nature and feel a sense of accomplishment. Additionally, it can be a fun activity to do with family and friends, creating a sense of community and shared experience.

Using a greenhouse is another great option to consider for growing organic produce. Greenhouses provide year-round growing opportunities, protect plants from pests and extreme weather, and can allow for a wider variety of plants to be grown. Additionally, they can help reduce the need for harmful chemicals and pesticides. Whether you are a seasoned gardener or a beginner, a greenhouse can help you take your organic gardening to the next level.

In conclusion, eating homegrown organic produce is the best option for a variety of reasons. It is the freshest, healthiest, and most sustainable option available, and it can save you money in the long run. It is also a fun and rewarding experience that can encourage a healthier lifestyle and support local agriculture. So why not try growing your own produce today? Your taste buds, wallet, and the environment will thank you.

Find out more about how you can add a beautiful new greenhouse to your garden by clicking here.

Growing Tomatoes in a Greenhouse

Growing tomatoes in a greenhouse year-round is a great way to ensure a steady supply of fresh, juicy tomatoes regardless of the season. However, it requires a certain level of knowledge and care to be successful. In this essay, we will explain step-by-step how to grow tomatoes in a greenhouse year-round.

Step 1: Choose the Right Tomato Varieties

When growing tomatoes in a greenhouse there are a variety of tomato varieties available for cultivation. When selecting tomato varieties, it is important to choose those that are adapted to greenhouse-growing conditions. Some of the most popular greenhouse tomato varieties include ‘Cherry Cascade,’ ‘Beefsteak,’ and ‘Celebrity.’ It is also important to consider disease resistance, productivity, and taste when selecting tomato varieties.

Step 2: Prepare the Greenhouse Environment

Growing tomatoes in a greenhouse requires balancing the environment ensure the success of year-round tomato cultivation. Temperature, humidity, light, and air circulation are all important factors to consider when preparing the greenhouse environment.

Tomatoes grow best in warm temperatures, so the greenhouse temperature should be maintained between 70-80°F during the day and 60-70°F at night. A ventilation system should also be in place to provide adequate air circulation and reduce humidity levels, which can lead to disease.

Light is also important for tomato growth. Greenhouse tomatoes require at least 12 hours of light per day to produce fruit. Supplemental lighting may be necessary during the winter months to ensure adequate light levels.

Step 3: Choose the Right Growing Medium

The growing medium is where the tomato plants will grow and develop their root systems. The growing medium should be loose and well-draining to ensure adequate aeration and water drainage. A mixture of peat moss, perlite, and vermiculite is often used as a growing medium when growing tomatoes in a greenhouse.

Step 4: Plant the Tomato Seeds

Tomato seeds should be planted in trays or pots filled with the chosen growing medium. The seeds should be planted ¼ inch deep and spaced at least 1 inch apart. After planting, the trays or pots should be kept moist but not waterlogged.

Once the seedlings have emerged and have grown to about 2-3 inches tall, they can be transplanted into larger pots filled with the growing medium. The plants should be spaced at least 18 inches apart to allow for adequate growth.

Step 5: Provide Nutrients and Water

Tomato plants require regular watering and fertilization to grow and produce fruit. Watering should be done regularly, but care should be taken not to overwater as this can lead to root rot. Fertilizer should be applied every 2-3 weeks using a balanced fertilizer that contains equal amounts of nitrogen, phosphorus, and potassium.

Step 6: Prune and Train the Tomato Plants

Growing tomatoes in a greenhouse requires pruning and training tomato plants for maintaining plant health and productivity. Tomato plants should be pruned to remove suckers and diseased or damaged leaves. Training involves tying the tomato plants to a support system, such as trellises or stakes, to prevent them from sprawling and to encourage vertical growth.

Step 7: Harvest the Tomatoes

Tomatoes should be harvested when they are fully ripe and have reached their desired size. It is important to pick the tomatoes carefully to avoid damaging the plant or the fruit. Tomatoes can be stored for several days at room temperature or in the refrigerator.

In conclusion, growing tomatoes in a greenhouse year-round is a great way to ensure a steady supply of fresh, juicy tomatoes. By following these steps, you can successfully grow tomatoes in a greenhouse year-round. Remember to choose the right tomato varieties, prepare the greenhouse environment, choose the right growing medium, plant the tomato seeds, provide nutrients and water, prune and train the tomato plants, and harvest the tomatoes with care.

For more helpful growing tips check out our Blog Page.

For more information on growing beautiful tomatoes check out these resources:

Awesome Nursery and Landscape in Bozeman, MT

https://www.thespruce.com/top-tomato-growing-tips-1402587

https://www.almanac.com/tomato-growing-tips

Exit mobile version